Skip to content Skip to main navigation Skip to footer

Blog

Selecting WatchGuard log file configurations in Cyfin

Syslog Configuration

In Cyfin, the following WatchGuard syslog log file configurations are available:

  • WatchGuard Syslog
  • WatchGuard Syslog (HTTP)
  • WatchGuard Syslog (HTTPS – Bytes)
  • WatchGuard Syslog (HTTPS)

WatchGuard supports byte information for HTTP as well as HTTPS traffic. To assist you in selecting the appropriate syslog log file configuration, determine what you need from the following:

  • For all Web traffic with no byte information, configure WatchGuard Syslog.
  • For a complete picture of your Web traffic, configure WatchGuard Syslog (HTTP), WatchGuard Syslog (HTTPS – Bytes), and WatchGuard Syslog (HTTPS).

Cyfin can be set to receive syslog data from your different WatchGuard devices. Each different device would have its own log file configuration.

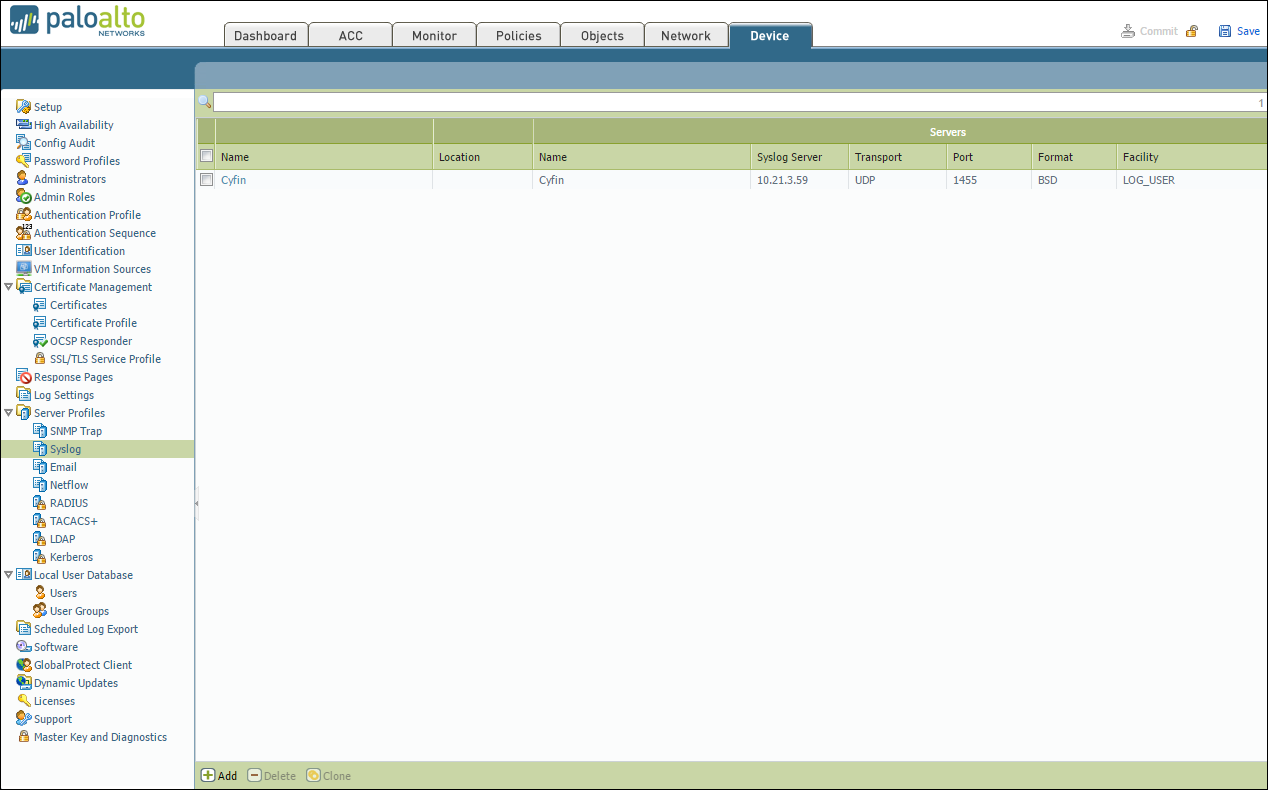
Cyfin Syslog Server listens for syslog messages from your WatchGuard device. Both UDP-based and TCP-based messages are supported.

  1. Select the WatchGuard Syslog log file configuration in Cyfin for your WatchGuard device.
  2. Specify the Directory in which the log files will be created. The default directory is [InstallPath]\wc\cf\log. NOTE:  For WatchGuard Syslog (HTTPS – Bytes), and WatchGuard Syslog (HTTPS), this is all that is needed.
  3. For WatchGuard Syslog and WatchGuard Syslog (HTTP), select Enable Syslog Server.
  4. For Port Type, select UDP or TCP for the Internet protocol you want to use.
  5. In the Listening Port field, the default port number is 1455. The listening port will be used by your WatchGuard device to transfer the data. You may change this number if necessary.
  6. At your WatchGuard device, specify the IP address of the Cyfin server and the listening port, and submit the syslog messages.
  7. Your log files will be created and displayed in the Log File Viewer in Cyfin.
  8. If you have many of the same WatchGuard devices, use one log file configuration with one listening port, and point each WatchGuard device to the same listening port.

Database Configuration

The WatchGuard PostgreSQL database configuration is also available.

We recommend that you install Cyfin on the same box with the WatchGuard Log Server (PostgreSQL) for easier configuration and speed. Your PostgreSQL database should also be an external database in order for Cyfin to read the log files. Note that Cyfin cannot read data from a database configured in WatchGuard Dimension.

Before trying to connect Cyfin to your WatchGuard Log Server, make sure you have selected to Send logs to WSM Server on the WatchGuard Logging page.

You will need the following information to connect Cyfin to the WatchGuard Log Server PostgreSQL logs:

  • Server Name
  • Database
  • Port
  • User Name
  • Password

Forwarding Palo Alto Logs to Cyfin Syslog Server

The following steps are required to forward Palo Alto logs to Cyfin Syslog Server:

  • Create a syslog server profile.
  • Configure a log forwarding profile to select the logs to be forwarded to Cyfin Syslog Server.
  • Assign the log forwarding profile to security rules.

The logs that must be forwarded are the Threat logs with Informational severity. Informational Threat logs include URL Filtering, Data Filtering, and WildFire logs.

Syslog Server Profile

  1. In your Palo Alto Firewall user interface, go to Device – Server Profiles – Syslog.
  2. Click Add at the bottom of the screen.
  3. Enter the following information:
    • Name – Cyfin
    • Syslog Server – IP address of where Cyfin is installed
    • Transport – UDP
    • Port – 1455
    • Format – BSD
    • Facility – LOG_USER
  4. Click OK to save the server profile.
  5. Click Commit at the top of the screen to commit the change.

serverprofilesmall

Log Forwarding Profile

    1. Go to Objects > Log Forwarding.
    2. Click Add to create a new log forwarding profile.
    3. Enter a Name to identify the profile.

    To forward each log type (Threat, URL, and Traffic), complete the following:

    Step 1: Configure Log Types

    1. Select the Log Type from the list:
      • For Threat logs, select severity Informational in the Filter drop-down menu.
      • For URL logs, select severity Informational in the Filter drop-down menu.
      • For Traffic logs, leave the Filter setting at All Logs.

    Step 2: Configure Syslog Server

    1. Under Syslog, click Add.
    2. Select the Syslog Server Profile created in the previous steps (e.g., Cyfin).
    3. Repeat steps 1 and 2 for each log type (Threat, URL, and Traffic) you want to forward.
    4. Click OK to save the profile.
    5. Click Commit at the top of the screen to save and apply the changes.

LogForwardingProfiles

URL Filtering Profile

To log the traffic from URL Filtering logs, you may need to adjust the Site Access for each allowed URL category.

  1. Go to Objects – URL Filtering – URL Filtering Profile.
  2. Select Categories – Site Access.
  3. Filter by “Allow.”
  4. Change “Allow” to “Alert” for each category listed.

Security Policy Rule

  1. Go to Policies – Security.
  2. Select the rule for which the log forwarding needs to be applied.
  3. Apply the security profile to the rule.
  4. Go to Actions and in the Log Forwarding drop-down field, select the log forwarding profile.
  5. Click OK. By default, when Threat logs are forwarded to Cyfin Syslog Server, the logs will have several fields including source IP address, destination IP address, and URL.
  6. Click Commit at the top of the screen to commit the change.

Now, you can configure Cyfin to write the forwarded Palo Alto log files to syslogYYYYXXXX.txt files. See Cyfin Configurations Steps for more information.

Additional Resources:

Reporting on cloud service activity

Providing a number of cloud service categories, CyBlock/Cyfin categorizes your cloud applications and services and allows you to assess their usage through cloud service reporting. Cloud service categories include Audio Streaming, Cloud Infrastructure, Cloud Storage, Collaboration, CRM, Development, File Sharing, HR, Personal E-Mail, Video Streaming, and VoIP Services.

On the Reports Selection page, in the Cloud Services Reports section, two report templates allow you to generate reports on only cloud service categories.

  • Cloud Services Detail
    • This is a low-level report that shows the specific URLs of cloud services by user, that is, visits to only the cloud service categories. It provides management with a complete view of every cloud service URL the user has clicked. This information can be used for cloud usage audits, identifying the most active users and the most heavily visited sites.
  • Cloud Services Summary
    • This is a high-level report that shows employee Web use of cloud services. It indicates by user the number of visits to sites in the cloud service categories. Information is presented by category and by individual user. The report can be used to identify cloud service usage patterns, better manage cloud subscriptions, and highlight abnormal activity.

How to resolve certificate-issued errors in browser

When attempting to go to a blocked secure site (HTTPS), users may experience any one of the following errors depending on the browser:

  • In Internet Explorer: There is a problem with this website’s security certificate.

CertError

  • In Chrome: Your connection is not private

CertError_Chrome

  • In Firefox: Your connection is not secure

CertError_Firefox

These are certificate-issued errors that occur if the Wavecrest certificate is not installed in the following scenarios:

  1. SSL Inspection is not enabled, and the user is attempting to go to a blocked secure site.
  2. SSL Inspection is enabled, and the user is is attempting to go to a blocked or allowed secure site.

The user does not receive the CyBlock blocking message for blocked secure sites. This is because even though a standard HTTP blocking page can still be presented to a workstation for blocked secure sites, since it is not part of the secure, encrypted HTTPS connection, the browser automatically ignores it.

To allow the blocking message to render properly for blocked secure sites or to permit users to access allowed secure sites with SSL Inspection enabled, the Wavecrest certificate needs to be installed on the CyBlock server and all client machines. More information and installation instructions can be found in the Wavecrest Certificate Installation Guide.

If you have any questions, please contact Technical Support at (321) 953-5351, Ext. 4 or support@wavecrest.net.

Configuring SonicWall Web traffic URLs for Cyfin syslog

The following information applies to versions earlier than SonicOS 6.2.6 Content Filtering Service (CFS) release 4.0.

In order to get SonicWall Web traffic URLs into the Cyfin syslog, you must first have the SonicWall Content Filtering Service enabled. You must also enforce the Content Filtering Service within the zone (LAN) in which your traffic will be forwarded. In order to get the service enabled and enforced, follow the steps below:

  1. Log on to your SonicWall interface.
  2. Go to Security Services – Content Filter – Configure.
  3. Select the Log Access to URL box.
  4. Go to Network – Zones. Find the LAN zone and click Configure.
  5. Select the Enforce Content Filtering Service box.
  6. Apply all changes above.

To verify that the changes were made successfully, you can make a copy of the raw syslogs that are generated after the change. These files are in the write location of your Cyfin installation (default location is …Wavecrest\Cyfin\wc\cf\log). You should see files being written called syslogXXXXXXXX.txt, if you have already configured the Cyfin setup correctly.

Make a copy of the most recent file after the change, and use a text editor (Notepad++ works well) to open the file. Search for the fields dstname= and arg= to confirm that they exist. You can use Ctrl+F to find these strings. You may need to wait for a short time after making the changes for them to take effect.

Note:  If the log files are showing as invalid in Cyfin, see Unable to see Web site hits information in SonicWall for a possible resolution.

Additional Resources:

CyBlock/Cyfin service or interface issues

If you are running into an issue with the CyBlock or Cyfin service, such as the service will not start, or the user interface will not show up when the service is started, run the following command to get more data on the service for Technical Support to analyze:

Windows

  1. For CyBlock, go to …Wavecrest\CyBlock\wc\service.
    • For Cyfin, use …Wavecrest\Cyfin\wc\service.
  2. Stop the CyBlock/Cyfin service.
  3. Open the service.conf file with WordPad as administrator.
  4. Find and change the field wrapper.console.loglevel=NONE to wrapper.console.loglevel=INFO.
  5. Save the file.
  6. Start the CyBlock/Cyfin service.
  7. In a command prompt, change directory to …Wavecrest\CyBlock\wc\service or …Wavecrest\Cyfin\wc\service.
  8. Run the wrapper.exe service.conf command.
  9. Restart the CyBlock/Cyfin service.
  10. Stop the wrapper.exe service.conf command with Ctrl+C.
  11. Copy and paste the contents from the command into a file and save the file.
  12. Send the file to support@wavecrest.net.

Linux

  1. For CyBlock, go to …Wavecrest\CyBlock\wc\service.
    • For Cyfin, use …Wavecrest\Cyfin\wc\service.
  2. Stop the CyBlock/Cyfin service.
  3. Open the service.conf file with a text editor.
  4. Find and change the field wrapper.console.loglevel=NONE to wrapper.console.loglevel=INFO.
  5. Save the file.
  6. Start the CyBlock/Cyfin service.
  7. In a command prompt, change directory to …Wavecrest\CyBlock\wc\service or …Wavecrest\Cyfin\wc\service.
  8. Run the ./wrapper.exe service.conf command.
  9. Restart the CyBlock/Cyfin service.
  10. Stop the ./wrapper.exe service.conf command with Ctrl+C.
  11. Copy and paste the contents from the command into a file and save the file.
  12. Send the file to support@wavecrest.net.

Reports Manager appears blank

If the Reports – Manager screen in Cyfin or CyBlock is blank, that is, there are no reports for you to select, the Reports Manager has most likely become corrupt.

To restore the Reports Manager, do the following:

  1. Go to Settings – Restore Points – Download.
  2. Click a date on which the Reports Manager was working to download that restore point.
  3. Save the restore point.
  4. Uncompress the restore point folder.
  5. For Cyfin, go to the …\cf\reports directory.
  6. For CyBlock, go to the …\cyblock\reports directory.
  7. Copy the system folder from the uncompressed restore point.
  8. Stop the CyBlock or Cyfin service.
  9. Go into your local install folder for the product:
    • For Cyfin: …\Wavecrest\Cyfin\wc\cf\reports
    • For CyBlock: …\Wavecrest\CyBlock\wc\cyblock\reports
  10. Rename the local system folder in this directory (OLDsystem).
  11. Paste the system folder that you have copied from the restore point.
  12. Start the CyBlock or Cyfin service.

After these steps, check your Reports – Manager screen to see that it is no longer blank. If it is, please contact Technical Support.

Web page or application will not load through CyBlock

When a Web page or application will not load, there is most likely a few possible things that could be in play. Many issues have to do with the site or content delivery network being blocked from another categorized site that is not part of the site you are trying to get to. Below are the troubleshooting steps:

  1. Is there a site being blocked by CyBlock?
    • Check the Real-Time Web Monitor for the IP address of the user in question, and also make sure you have the Authentication Challenge Requests (407) and the Authentication Type check boxes selected.
    • Do you see any URLs that appear in red? These URLs are blocked URLs and must be allowed in one of your filter policies or white lists.
  1. If there are no blocked sites, check for any 407s in the Real-Time Monitor.
    • Copy these URLs with 407s and add them to the User Management – Authentication – Bypass tab. Add the URL in question, with User Agent *.
    • Does the site now load?
  1.  If you have tried the above with still no success, try using another browser such as Firefox or Chrome.
    • Does it work with another browser other than Internet Explorer?
    • If it works with other browsers, it may be the Internet Explorer Compatibility Mode.
    • Open Internet Explorer, go to Tools – Compatibility View settings, and unselect the Display intranet sites in Compatibility View check box.
    • Does the Web page or application now load?

Blocking message displays wrong user ID

If the blocking message shows the wrong user ID and the user is on Windows 7, it is most likely a cached user ID issue.

Please check the following:

  • Open User Accounts by clicking the Start button, and selecting Control Panel and then User Accounts.
  • In the left pane, click Manage your credentials.
  • If the user has any entries under Windows Credentials, remove these stored/cached IDs.

Open a new browser, and the user should now be utilizing his normal Windows domain logon.

Group policy proxy settings with Windows Server 2008 R2

Windows Server 2008 R2 does not have GPO settings to force Windows 7 or any other Windows machines with Internet Explorer 9+ to go through the proxy with the usual Internet Explorer Maintenance option that forces proxy settings. Below are helpful articles on how to get this working with the new Group Policy Preferences within Server 2008 R2 registry settings: