The following steps are required to forward Palo Alto logs to Cyfin Syslog Server:
- Create a syslog server profile.
- Configure a log forwarding profile to select the logs to be forwarded to Cyfin Syslog Server.
- Assign the log forwarding profile to security rules.
The logs that must be forwarded are the Threat logs with Informational severity. Informational Threat logs include URL Filtering, Data Filtering, and WildFire logs.
Syslog Server Profile
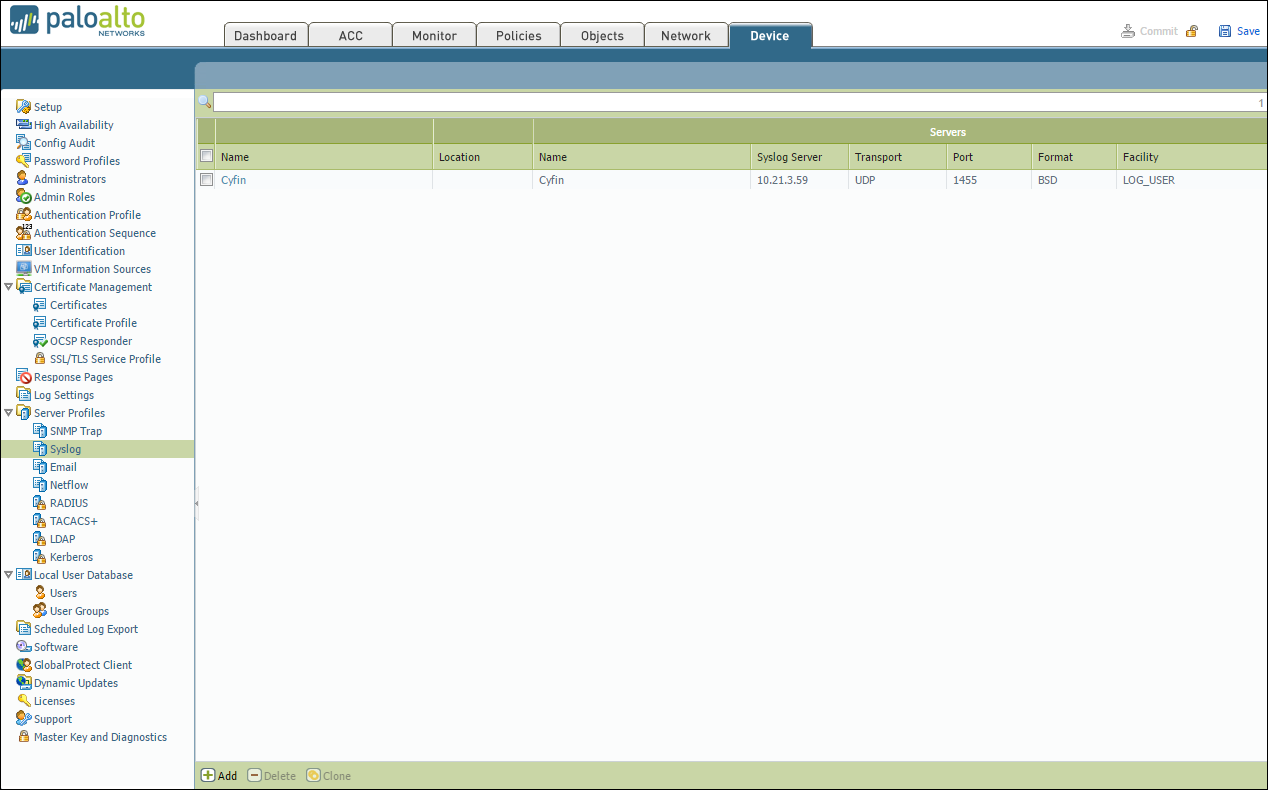
- In your Palo Alto Firewall user interface, go to Device – Server Profiles – Syslog.
- Click Add at the bottom of the screen.
- Enter the following information:
- Name – Cyfin
- Syslog Server – IP address of where Cyfin is installed
- Transport – UDP
- Port – 1455
- Format – BSD
- Facility – LOG_USER
- Click OK to save the server profile.
- Click Commit at the top of the screen to commit the change.
Log Forwarding Profile
-
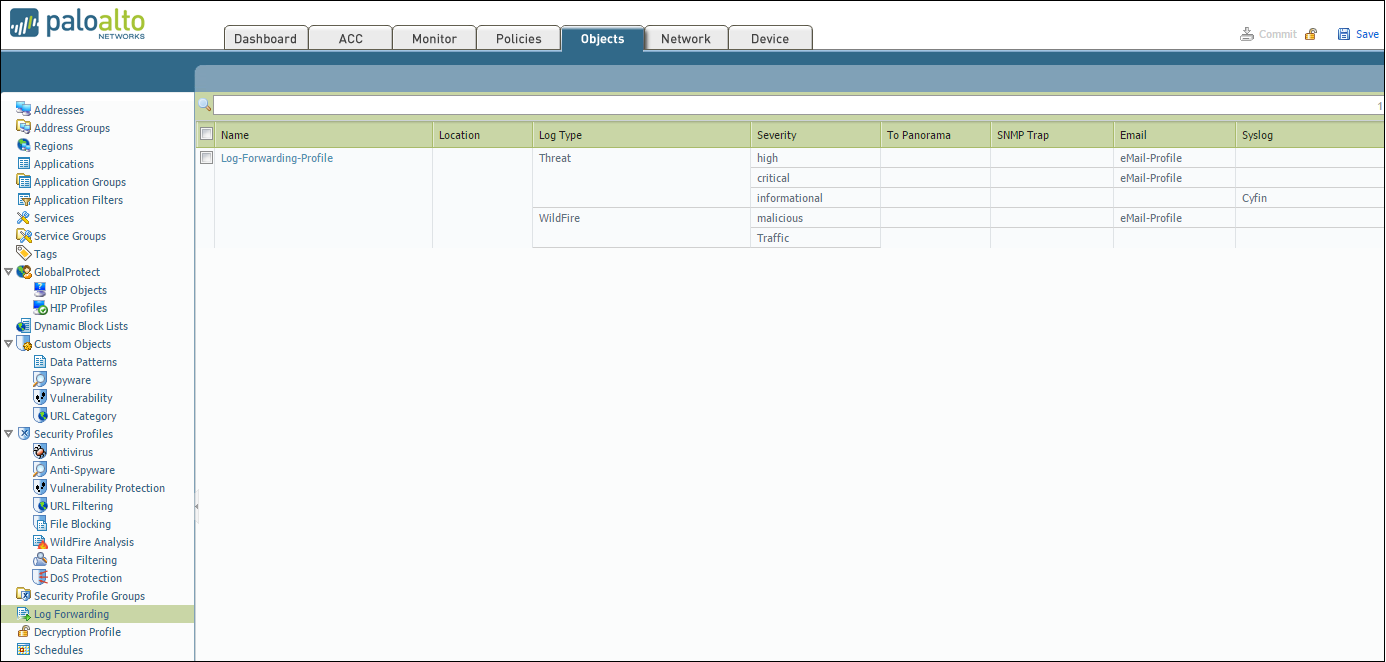
- Go to Objects > Log Forwarding.
- Click Add to create a new log forwarding profile.
- Enter a Name to identify the profile.
To forward each log type (Threat, URL, and Traffic), complete the following:
Step 1: Configure Log Types
- Select the Log Type from the list:
- For Threat logs, select severity Informational in the Filter drop-down menu.
- For URL logs, select severity Informational in the Filter drop-down menu.
- For Traffic logs, leave the Filter setting at All Logs.
Step 2: Configure Syslog Server
- Under Syslog, click Add.
- Select the Syslog Server Profile created in the previous steps (e.g., Cyfin).
- Repeat steps 1 and 2 for each log type (Threat, URL, and Traffic) you want to forward.
- Click OK to save the profile.
- Click Commit at the top of the screen to save and apply the changes.
URL Filtering Profile
To log the traffic from URL Filtering logs, you may need to adjust the Site Access for each allowed URL category.
- Go to Objects – URL Filtering – URL Filtering Profile.
- Select Categories – Site Access.
- Filter by “Allow.”
- Change “Allow” to “Alert” for each category listed.
Security Policy Rule
- Go to Policies – Security.
- Select the rule for which the log forwarding needs to be applied.
- Apply the security profile to the rule.
- Go to Actions and in the Log Forwarding drop-down field, select the log forwarding profile.
- Click OK. By default, when Threat logs are forwarded to Cyfin Syslog Server, the logs will have several fields including source IP address, destination IP address, and URL.
- Click Commit at the top of the screen to commit the change.
Now, you can configure Cyfin to write the forwarded Palo Alto log files to syslogYYYYXXXX.txt files. See Cyfin Configurations Steps for more information.
Additional Resources:
- Palo Alto Firewall Syslog Setup from Palo Alto Customer Support: Video Tutorial
- Wavecrest video on setting up Cyfin Syslog: Cyfin Syslog Setup Video
- Palo Alto Customer Service Syslog guide: PA Tips and Tricks Link

