Skip to content Skip to main navigation Skip to footer

Tag: palo alto firewall

Configuring log forwarding from Palo Alto Panorama to Cyfin Syslog Server

With your firewalls already forwarding logs to Panorama, the high-level steps to forward Palo Alto Panorama logs to Cyfin Syslog Server include the following:

  • Configure the server profile that defines how Panorama and Log Collectors connect to the external service, that is, Cyfin Syslog Server.
  • Assign the server profile to the log settings of Panorama and to Collector Groups.

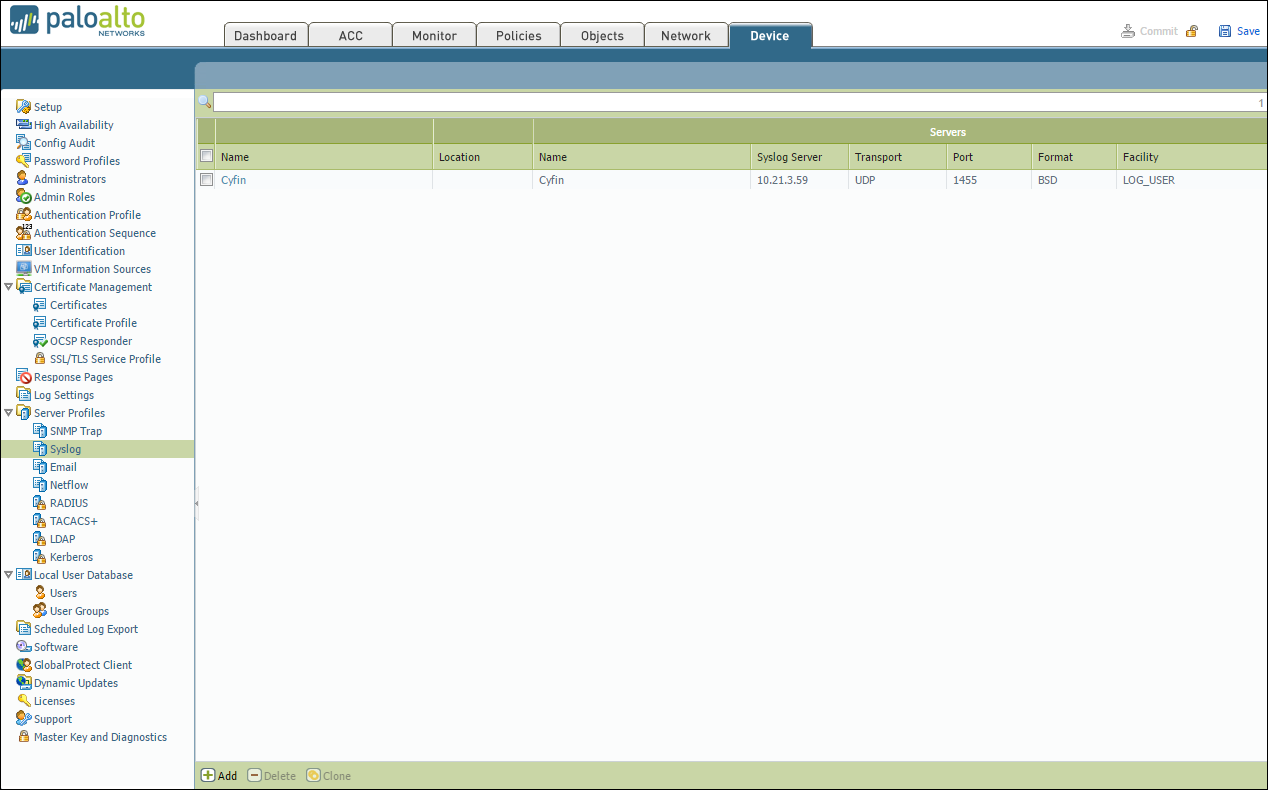
STEP 1: Configure a server profile for Cyfin Syslog Server that will receive log information.

  1. Select Panorama – Server Profiles and select Syslog.
  2. Configure the syslog server profile.

STEP 2: Configure destinations for:

  • Logs that the Panorama management server and Log Collectors generate.
  • Firewall logs that a Panorama virtual appliance in Legacy mode collects.
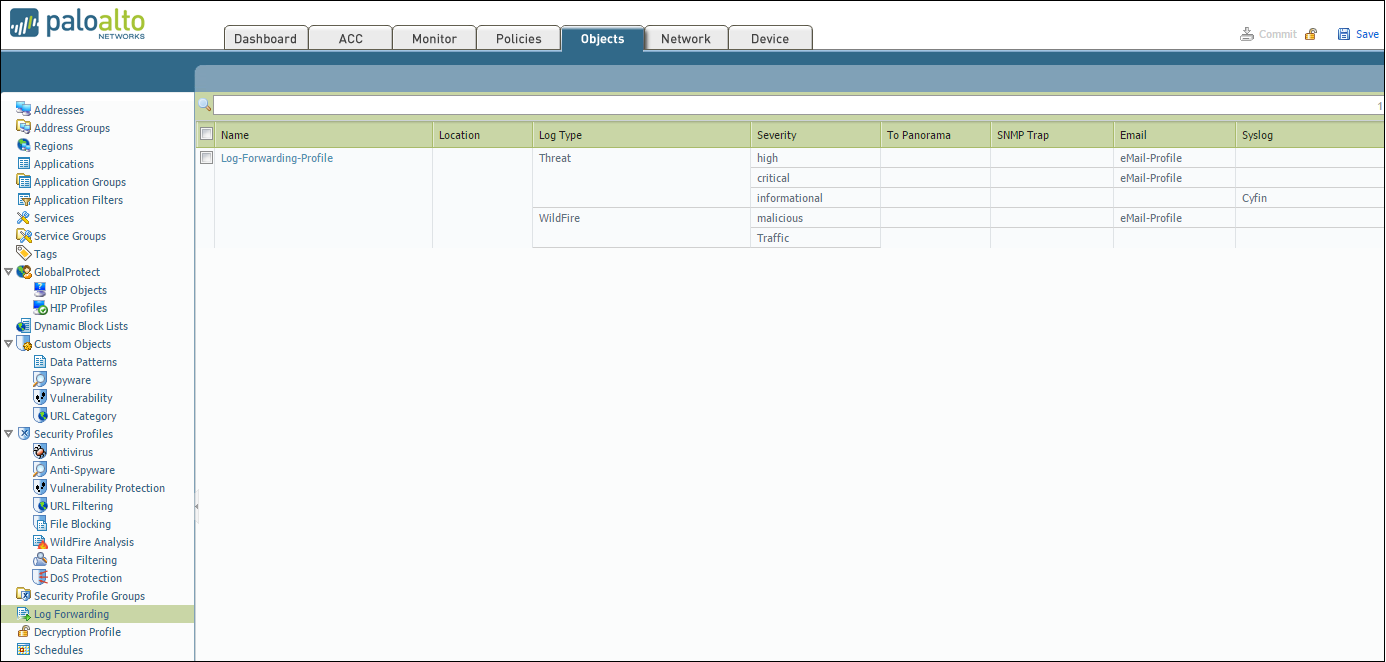
  1. Select Panorama – Log Settings.
  2. Add one or more match list profiles for each log type.

The profiles specify log query filters, forwarding destinations, and automatic actions such as tagging. For each match list profile:

    1. Enter a Name to identify the profile.
    2. Select the Log Type.
    3. In the Filter drop-down field, select Filter Builder. Specify the following and then Add each query:
      • Connector logic (and/or)
      • Log Attribute
      • Operator to define inclusion or exclusion logic
      • Attribute Value for the query to match
    4. Add the server profile you configured for Cyfin Syslog Server.
    5. Click OK to save the profile.

STEP 3: Configure destinations for firewall logs that Log Collectors receive.

  1. Select Panorama – Collector Groups and edit the Collector Group that receives the firewall logs.
  2. Select Collector Log Forwarding and see step Add one or more match list profiles for each log type above.
  3. Click OK to save your changes to the Collector Group.

STEP 4: Commit and verify your configuration changes.

  1. Select Commit – Commit and Push to commit your changes to Panorama and push the changes to device groups, templates, and Collector Groups.
  2. Verify that Cyfin Syslog Server is receiving the log information in one of the following ways:
    • In the log folder, check for the syslog.txt file.
    • In Cyfin, go to Data Management – Log Data Source – Viewer to check for syslog.txt.

Additional Resources:

Forwarding Palo Alto Logs to Cyfin Syslog Server

The following steps are required to forward Palo Alto logs to Cyfin Syslog Server:

  • Create a syslog server profile.
  • Configure a log forwarding profile to select the logs to be forwarded to Cyfin Syslog Server.
  • Assign the log forwarding profile to security rules.

The logs that must be forwarded are the Threat logs with Informational severity. Informational Threat logs include URL Filtering, Data Filtering, and WildFire logs.

Syslog Server Profile

  1. In your Palo Alto Firewall user interface, go to Device – Server Profiles – Syslog.
  2. Click Add at the bottom of the screen.
  3. Enter the following information:
    • Name – Cyfin
    • Syslog Server – IP address of where Cyfin is installed
    • Transport – UDP
    • Port – 1455
    • Format – BSD
    • Facility – LOG_USER
  4. Click OK to save the server profile.
  5. Click Commit at the top of the screen to commit the change.

serverprofilesmall

Log Forwarding Profile

  1. Go to Objects – Log Forwarding.
  2. Select the syslog server profile (Log-Forwarding-Profile) for forwarding Threat logs to Cyfin.
  3. In the Threat drop-down field, ensure that for the Severity Informational option, Cyfin is selected in the Syslog column.
  4. To forward URL Filtering logs, add Log Type “URL” and set Severity to “Informational.” Then set Syslog to “Cyfin.”
  5. To forward Traffic logs, add Log Type “Traffic” and set Severity to “Informational.” Then set Syslog to “Cyfin.”
  6. Click Commit at the top of the screen to commit the change.

LogForwardingProfiles

URL Filtering Profile

To log the traffic from URL Filtering logs, you may need to adjust the Site Access for each allowed URL category.

  1. Go to Objects – URL Filtering – URL Filtering Profile.
  2. Select Categories – Site Access.
  3. Filter by “Allow.”
  4. Change “Allow” to “Alert” for each category listed.

Security Policy Rule

  1. Go to Policies – Security.
  2. Select the rule for which the log forwarding needs to be applied.
  3. Apply the security profile to the rule.
  4. Go to Actions and in the Log Forwarding drop-down field, select the log forwarding profile.
  5. Click OK. By default, when Threat logs are forwarded to Cyfin Syslog Server, the logs will have several fields including source IP address, destination IP address, and URL.
  6. Click Commit at the top of the screen to commit the change.

Now, you can configure Cyfin to write the forwarded Palo Alto log files to syslogYYYYXXXX.txt files. See Cyfin Configurations Steps for more information.

Additional Resources: